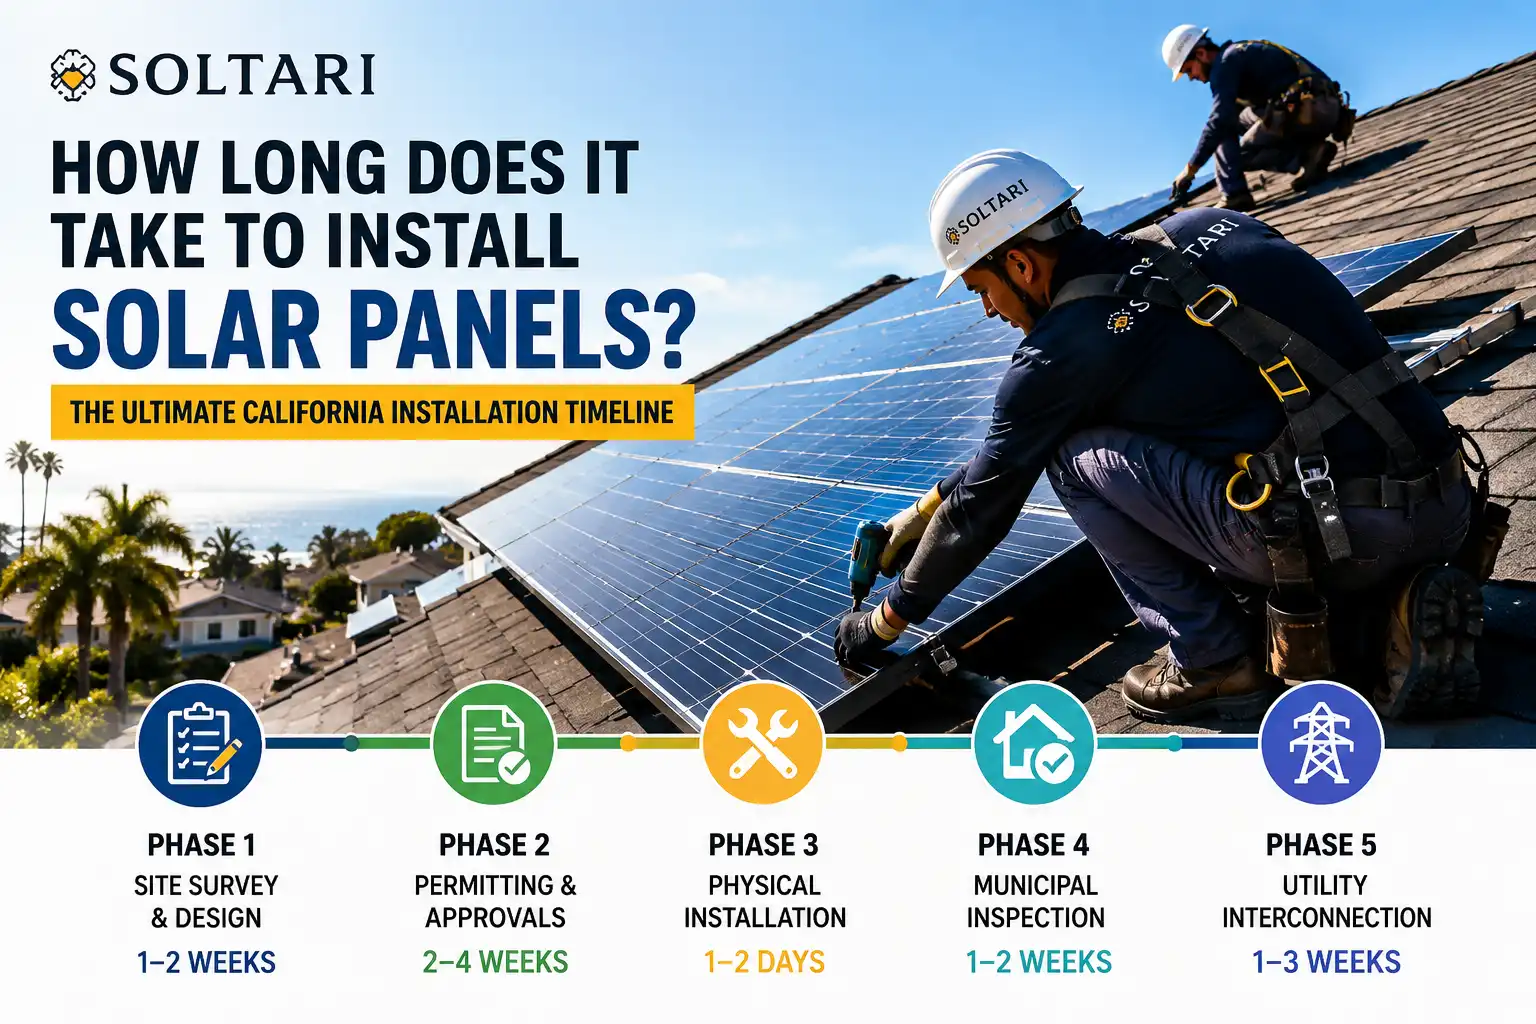
When California homeowners decide to go solar, one of the most immediate practical questions they ask is “how long does it take to install solar panels” on a residential property. There is often a misconception about the overall process. While the physical mounting of panels onto your roof typically takes just a day or two, the entire end-to-end solar panel installation process including engineering design, city permitting, and utility interconnection approval generally spans 4 to 8 weeks. This comprehensive guide breaks down the five distinct timeline phases, details what happens at each stage, and explains how to avoid unnecessary delays.
Understanding the Total Timeline for Residential Solar Installation
A successful residential solar transition involves administrative coordination between municipal building departments, utility companies, and licensed electrical contractors.
The Physical Rooftop Installation Phase versus Total Project Time
It is essential to separate physical labor from administrative processing:
-
The Physical Roof Labor: Mounting the racking, securing the solar modules, and running electrical conduit typically requires only 1 to 2 days of on-site work.
-
The Total Project Timeline: The remaining 4 to 7 weeks are dedicated to initial site surveys, structural engineering blueprints, municipal building permits, and securing Permission to Operate (PTO) from your local utility (such as PG&E).
Why California Permitting and Utility Interconnection Cause Delays
In Northern California, particularly around Santa Cruz and Monterey County, the timeline is heavily influenced by municipal and utility bureaucracy.
-
City and County Building Departments: Local jurisdictions require thorough plan reviews to ensure racking attachments satisfy local wind and seismic codes.
-
Utility Interconnection (PG&E): The electric utility must review your system schematics to verify that backfeeding energy onto the local grid will not overload regional transformers. Partnering with an experienced, licensed California solar contractor ensures these administrative submissions are completed without technical errors.
Overview of the Five Phases of a Solar Project Timeline
| Project Phase | Average Duration | Primary Milestone / Deliverable |
| Phase 1: Site Survey & Design | 1 to 2 Weeks | Engineering blueprints & load calculations |
| Phase 2: Permitting & Approvals | 2 to 4 Weeks | Municipal building & electrical permits issued |
| Phase 3: Physical Installation | 1 to 2 Days | Panels, racking, inverters, & wiring mounted |
| Phase 4: Municipal Inspection | 1 to 2 Weeks | City inspector signs off on code compliance |
| Phase 5: Utility Interconnection | 1 to 3 Weeks | Formal Permission to Operate (PTO) granted |
Phase by Phase Breakdown of the Solar Installation Process
Understanding what occurs during each phase helps homeowners manage expectations and prepare their property.
Initial Site Assessment and Engineering Load Calculation
The project begins the moment you sign a solar agreement. A certified technician visits your home to perform a comprehensive physical and electrical site survey:
-
Roof Structural Audit: Assessing rafter spacing, shingle condition, and roof pitch.
-
Shading Analysis: Utilizing 3D shade readers to measure sun exposure throughout the year.
-
Electrical Audit: Inspecting your main breaker box busbar capacity and grounding setup.
This data is handed over to CAD engineers who draft custom schematics for your custom home solar installations.
Submitting City Permits and Municipal Plan Approvals
Once engineering drawings are finalized, plans are submitted to your city or county building department.
-
The Review Window: Depending on local staffing levels, permit approval can take anywhere from 5 business days to a full month.
-
Code Compliance: Structural engineers verify that the racking system satisfies California building codes, fire setback rules (requiring 3 feet of clear space on roof ridges), and electrical grounding laws.
The Physical Rooftop and Electrical Installation Days
Once permits are approved, the physical installation is scheduled.
-
Day 1: The installation crew sets up safety rigging, measures rafter locations, installs watertight roof flashing, and mounts the aluminum racking rails.
-
Day 2: The panels are unboxed, bolted onto the rails, and wired together in strings. Simultaneously, a licensed C10 electrician installs the inverter, AC disconnect switches, and conduit runs connecting the solar array to your electrical panel.
Municipal Building Inspection and Electrical Sign Off
After physical construction is complete, your system cannot be turned on permanently until it passes an official inspection. A municipal building inspector visits the property to verify:
-
Mounting bolts are attached directly to structural rafters.
-
Electrical conduit is grounded properly.
-
Rapid shutdown safety switches are installed to protect firefighters in an emergency.
Securing Permission to Operate from PG&E and Utility Interconnection
The final hurdle is receiving formal Permission to Operate (PTO) from your utility provider (such as PG&E).
-
The Application: Your installer submits the final signed inspection document and interconnection agreement to the utility.
-
The Approval: The utility reviews the documentation, updates your account to the Net Billing Tariff (NEM 3.0), and grants PTO. Once PTO is granted, you can safely flip the main solar breaker and begin powering your home with clean energy.
Key Factors That Can Accelerate or Delay Your Solar Project
Certain home upgrades and system choices can impact your project’s overall timeline.
How Electrical Main Panel Upgrades Impact Installation Speed
If your home has an older 100-amp electrical breaker panel, adding a solar array may require a main panel upgrade (MPU) to 200 amps to satisfy the National Electrical Code 120% Rule.
-
Timeline Impact: Adding an MPU can add 1 to 3 weeks to your overall project timeline, as it requires coordinating a temporary service disconnect and reconnect with the utility company.
Integrating Battery Backup Systems with Existing Solar Wiring
Adding energy storage (such as a Tesla Powerwall 3 or Enphase battery) during your initial solar installation adds minimal physical time (typically just 1 extra day of electrical installation). However, battery storage system integration requires specialized fire-safety permitting and electrical plan checks, which can add a few extra days to the initial design phase.
Working with Licensed Contractors to Avoid Permit Rejections
The most common cause of project delays is working with inexperienced installers who submit incomplete engineering plans to city building departments. A rejected permit application forces the design team to re-draft schematics, adding weeks of delay to your project.
Starting Your Solar Energy Project
Planning your solar project with clear timeline milestones ensures a smooth, stress-free transition.
How NABCEP Certified Design Prevents Unnecessary Project Delays
At Soltari, LLC, we prioritize quiet precision, craftsmanship, and engineering excellence. Our team of NABCEP-certified designers and C10 licensed electricians handles every stage of your installation from initial site audit to municipal permitting and final PG&E utility interconnection. We design custom systems that pass city inspections on the first attempt, minimizing your total project timeline.
Schedule a Free Site Assessment to Receive Your Custom Timeline
Ready to start your journey toward power independence? Don’t leave your project’s timeline to chance. Schedule a free site assessment today to receive a detailed site audit, custom engineering plan, and itemized project schedule for your property. (Internal Link to /contact-us/)
Frequently Asked Questions About Solar Installation Timelines
Can I turn on my solar panels immediately after the installation crew finishes working?
No. You must wait for formal Permission to Operate (PTO) from your utility provider (such as PG&E) and sign-off from your local city building inspector before turning your system on. Running your system before receiving PTO can result in utility fines and inaccurate billing charges.
How long does it take to physically install solar panels on a roof?
The physical installation on your roof typically takes 1 to 2 days for a standard residential system (15-25 panels). Complex roofs or systems requiring major main electrical panel upgrades may take 3 days.
What is the longest phase of the solar installation process?
The longest phase is typically the administrative permitting and utility approval phase. City building department reviews take 2 to 4 weeks, and utility PTO approvals take 1 to 3 weeks after physical construction is complete.
Do weather conditions impact the solar installation schedule?
Yes. Physical roof installation cannot take place during rain, high winds, or severe storms due to technician safety risks and the danger of exposing your roof deck to water damage while mounting racking attachments.
How long does the PG&E PTO approval take after inspection?
For standard residential solar systems in Northern California, PG&E typically grants Permission to Operate (PTO) within 5 to 15 business days after receiving the final signed building permit and completed interconnection paperwork.
Does adding a home battery increase the overall installation time?
The physical installation of a home battery adds about one additional day of electrical labor. The permitting review for battery storage may take a few extra days, but it is completed concurrently with your solar panel permits.